
以前から、ある特定のメールアドレスからのメールには必ず返信しないといけない。
しかも、ASAP(なる早)で。
というものがありまして、とは言え、普段メールに全く注意を払っていない自分なので、全くもって気が付かない。困った。。。
という個人的な問題がありまして、どうにかしないとなぁ。。。
ということで、調べて見ると、Google Apps Scriptで、表記のようなやり方を、できることが分かりましたので、作成して見ました。
ホント、色々と助かる時代になりましたね。
とは言え、今回、ほぼ、自分の頭を巡らすということはしておらず、参考にさせて頂いたサイトの方のほぼコピーです。


忘れてしまうので、ざっと書いておきたいということになります。
流れは以下になります。
1.Line Notifyのトークンを取得
2.Google Apps Scriptにてコードの作成と実行
では、作成していきましょう。
1.Line Notifyのトークンを取得
トークンですが、以前、下記記事を作成する時、既にトークンを取得していますので、今回、詳細は割愛します。

良かったら、参照して見てください。
2.Google Apps Scriptにてコードの作成と実行
「google apps script」の、リンクを用意しておきましたので、どうぞ。↓

「google apps script」で検索した場合は、以下の検索結果画面から飛ぶといいです。↓
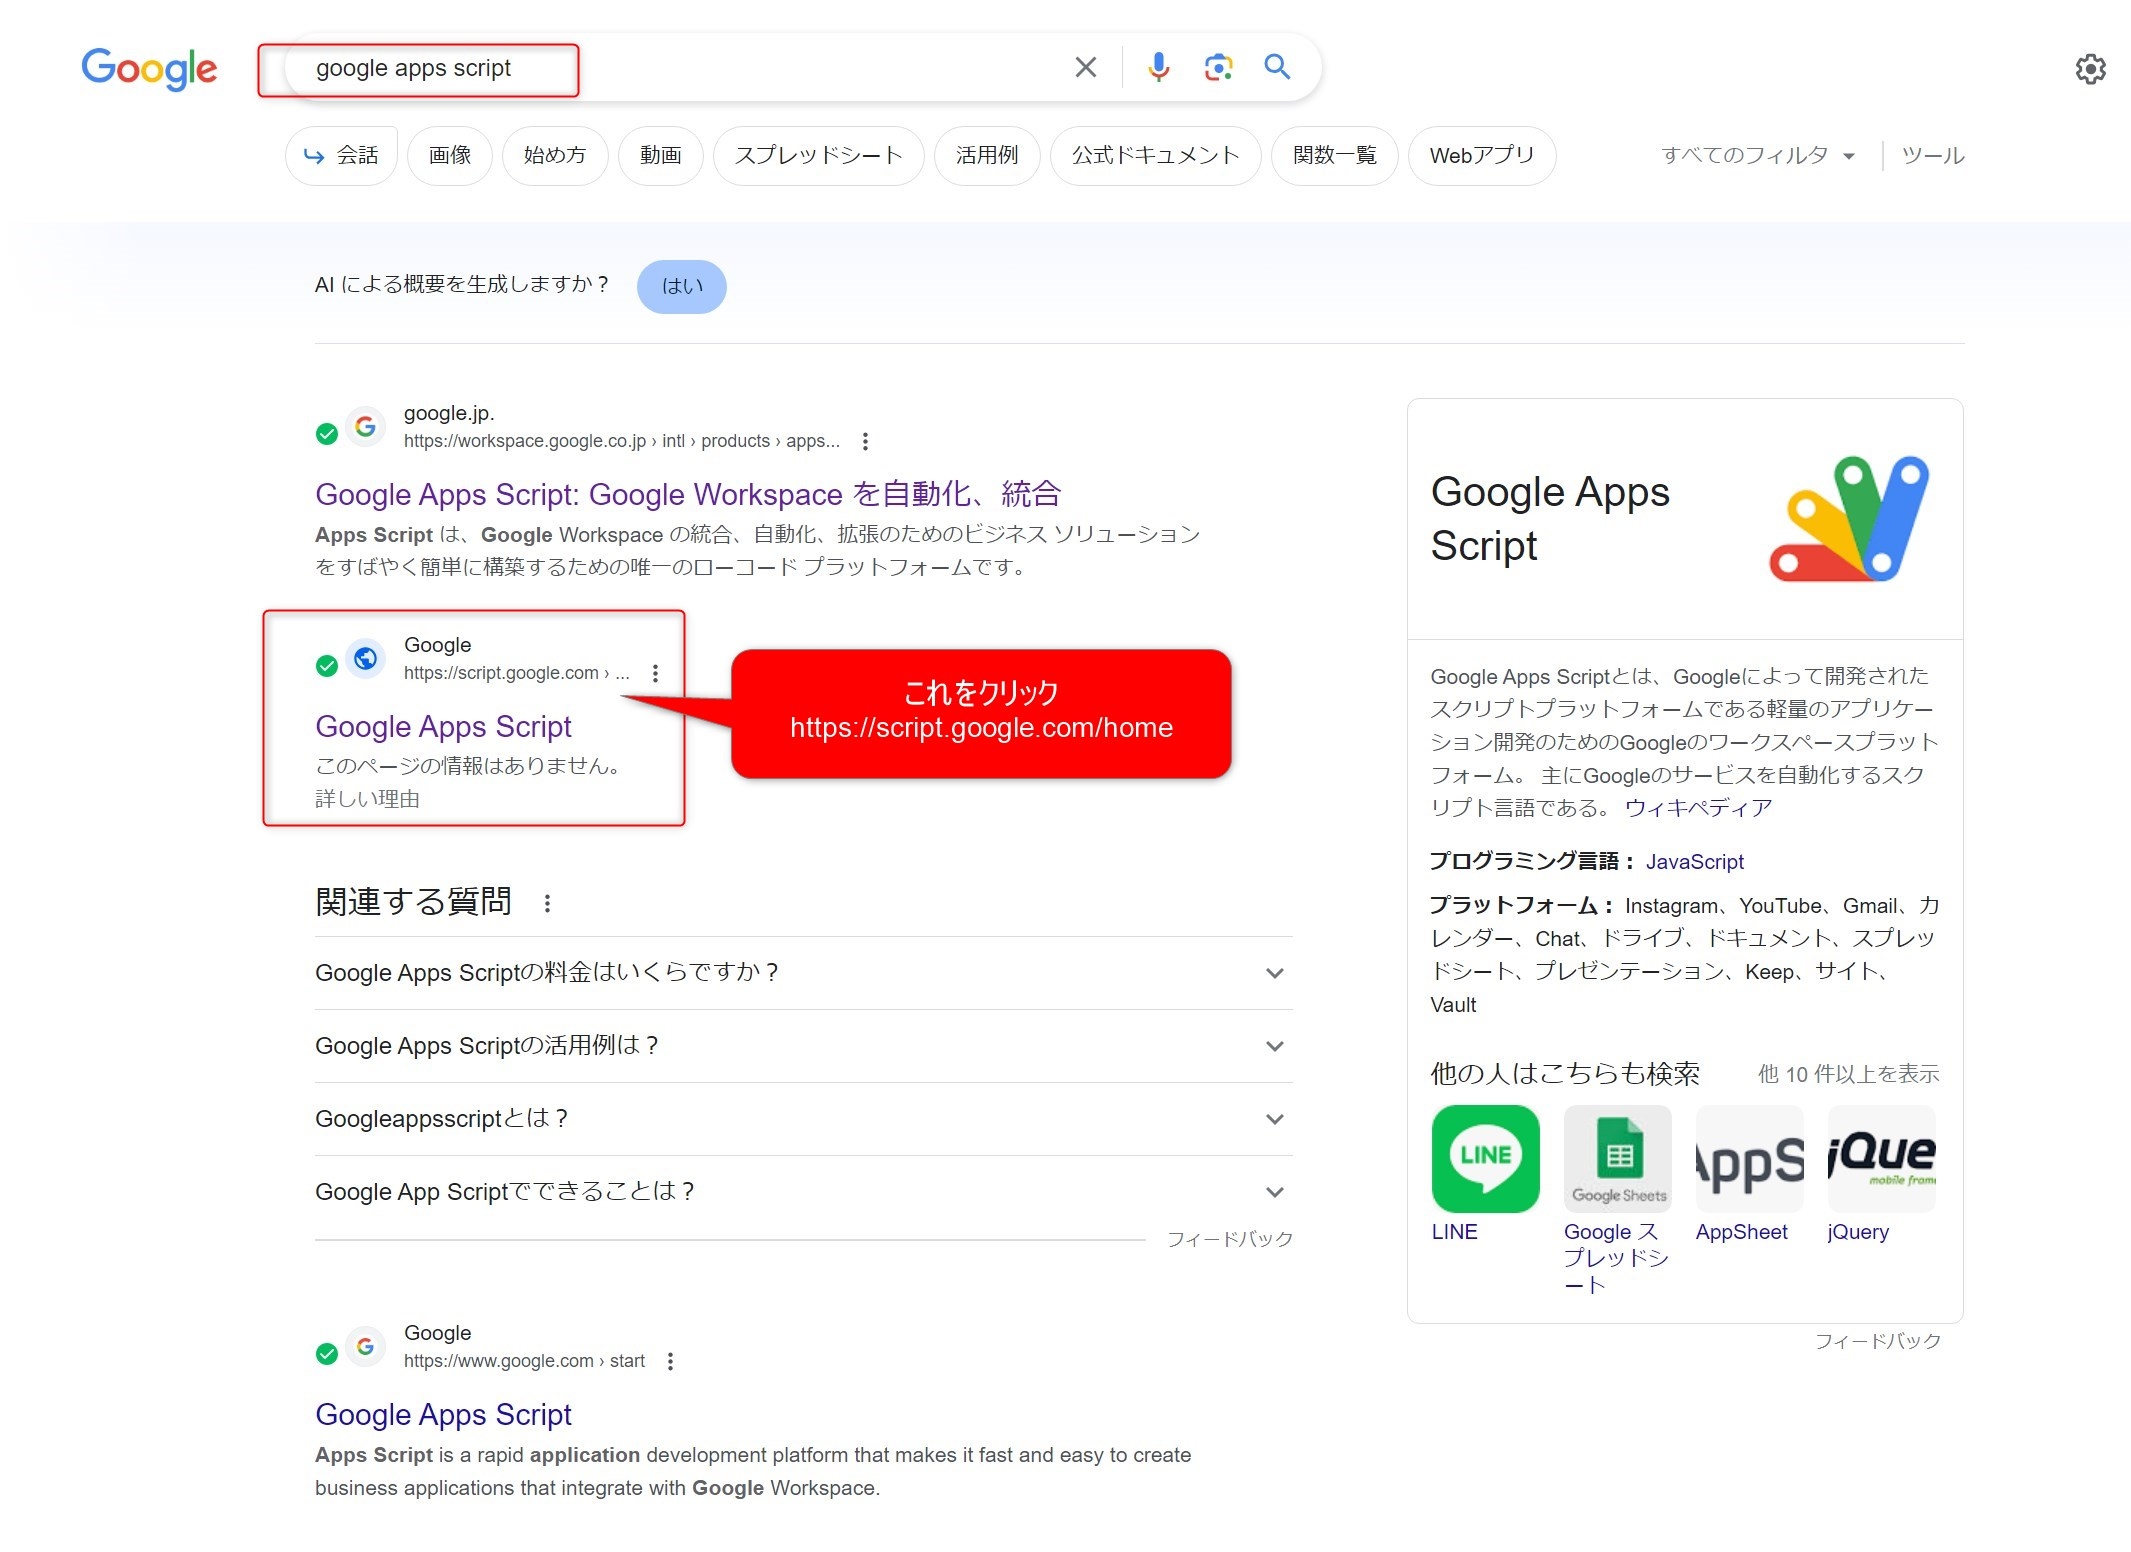
開くと以下のようになります。
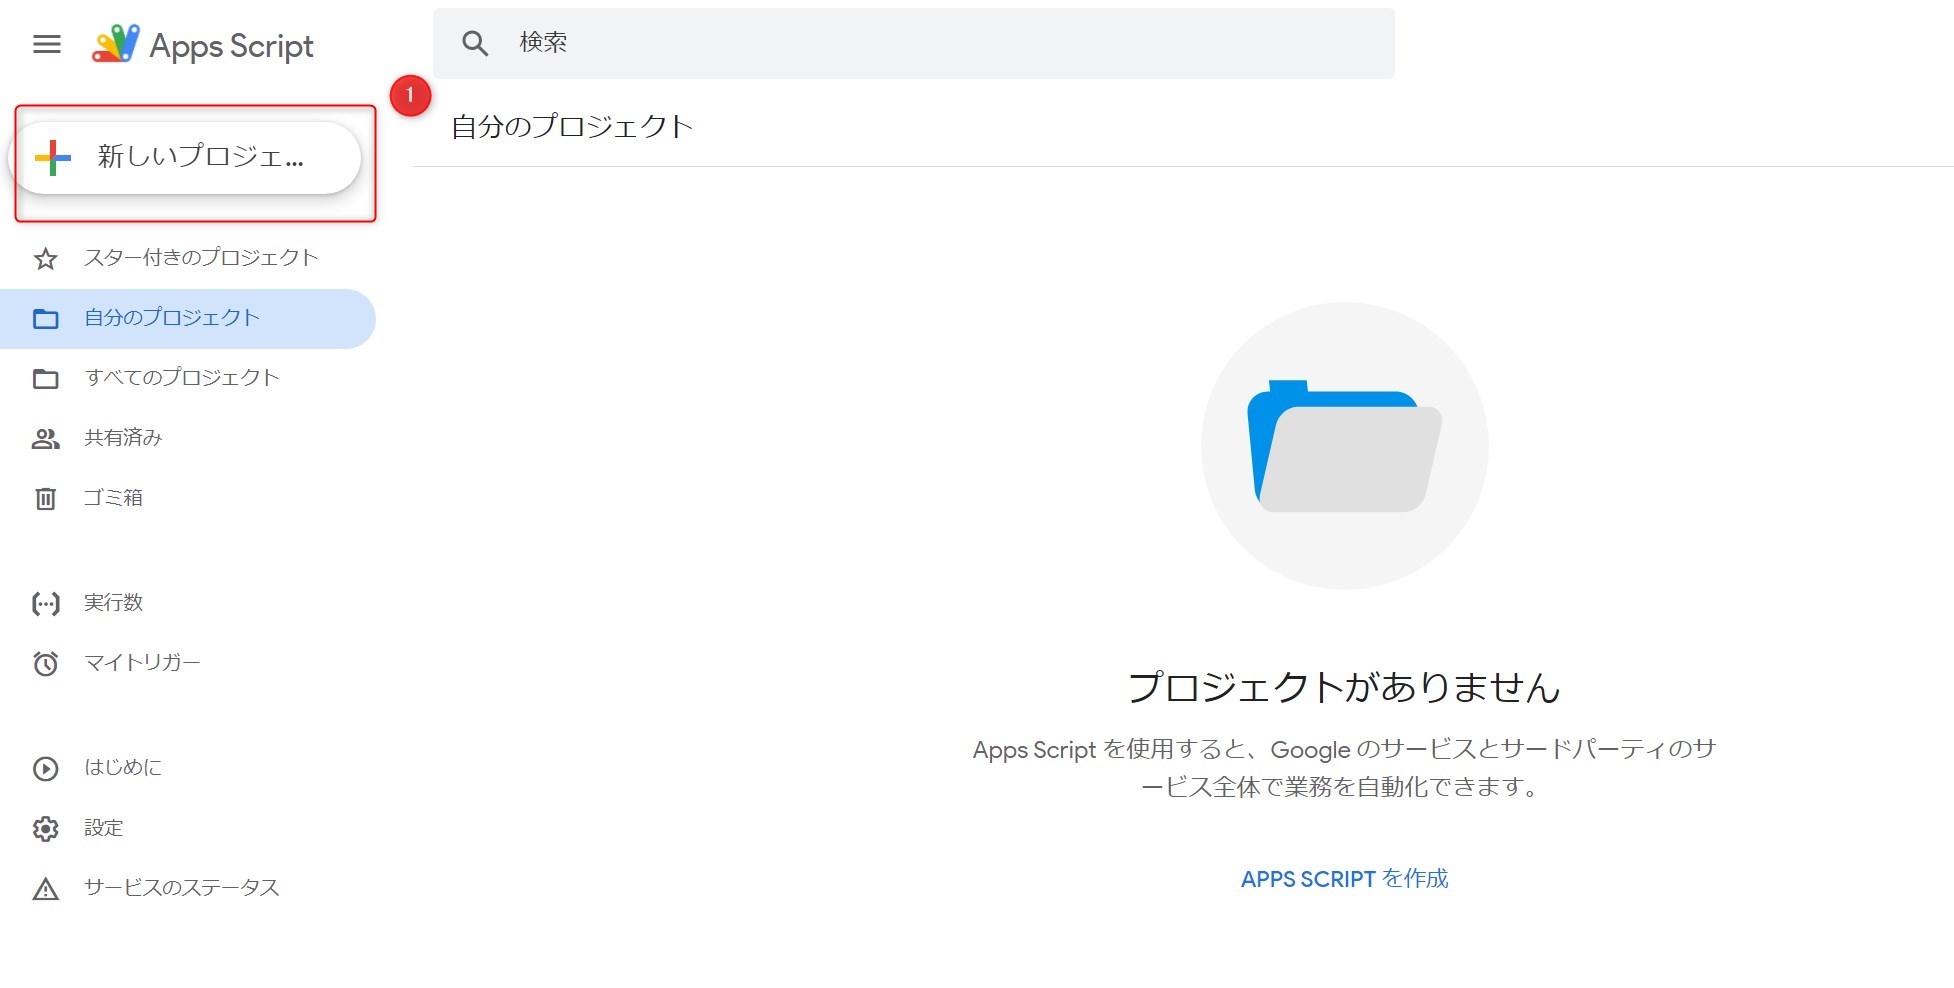
上記、赤丸①の新しいプロジェクト押します。
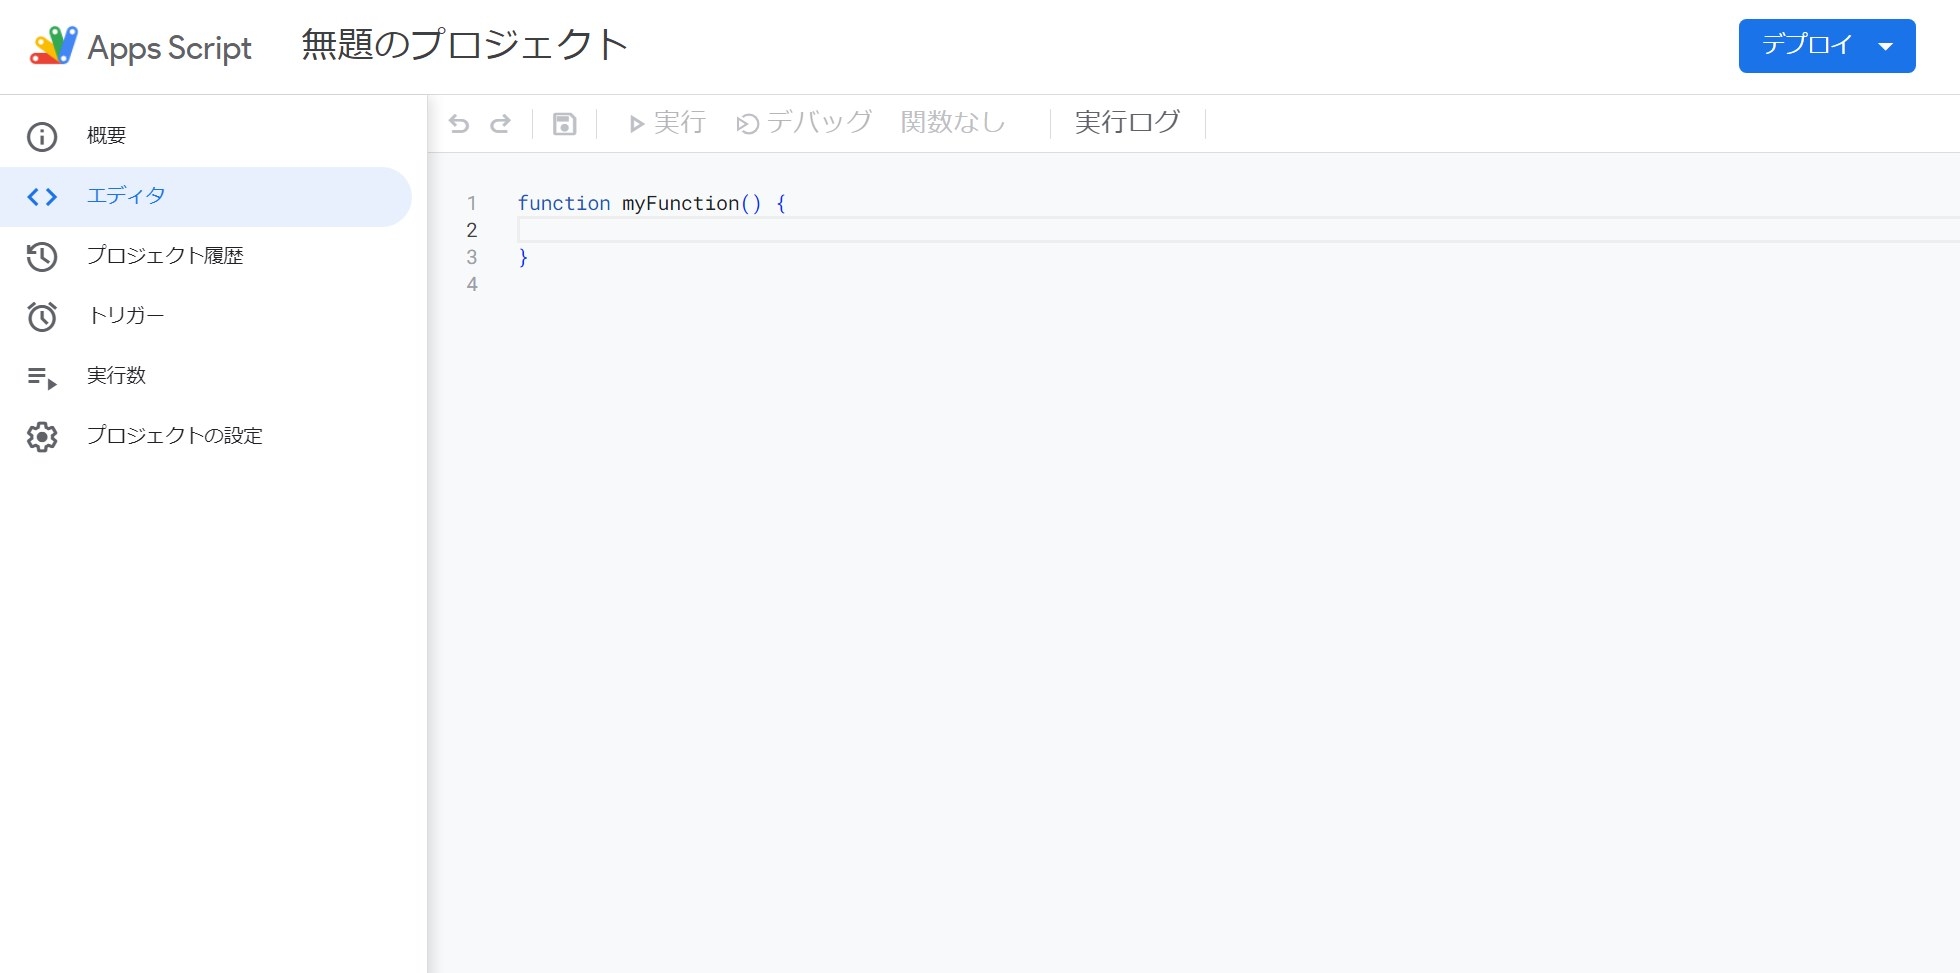
で、コードを記入するところが出て来ます。
デフォルトで記入されている、以下のコードは必要無いので、削除します。
function myFunction() {

}
そして以下のコードをまるっとコピペします。
const LINE_NOTIFY_TOKEN = '取得したトークンを記入'
const FROM_ADDRESS = ['xxxxx@xxxxx.xxxxxxx.jp','xxxxxxxxx@gmail.com'].join(' OR ')
const ENDPOINT = 'https://notify-api.line.me/api/notify'
const MINUTES_INTERVAL = 5
function main() {
const notices = fetchNotices()
if (notices.length === 0) {
return
}
for (const notice of notices) {
send(notice)
}
}
function fetchNotices() {
const now = Math.floor(new Date().getTime() / 1000)
const intervalMinutesAgo = now - (60 * MINUTES_INTERVAL)
const query = `(is:unread from:(${FROM_ADDRESS}) after:${intervalMinutesAgo})`
/* const query = `(from:(${FROM_ADDRESS}))` */
const threads = GmailApp.search(query)
if (threads.length === 0) {
return []
}
const mails = GmailApp.getMessagesForThreads(threads)
const notices = []
for (const messages of mails) {
const latestMessage = messages.pop()
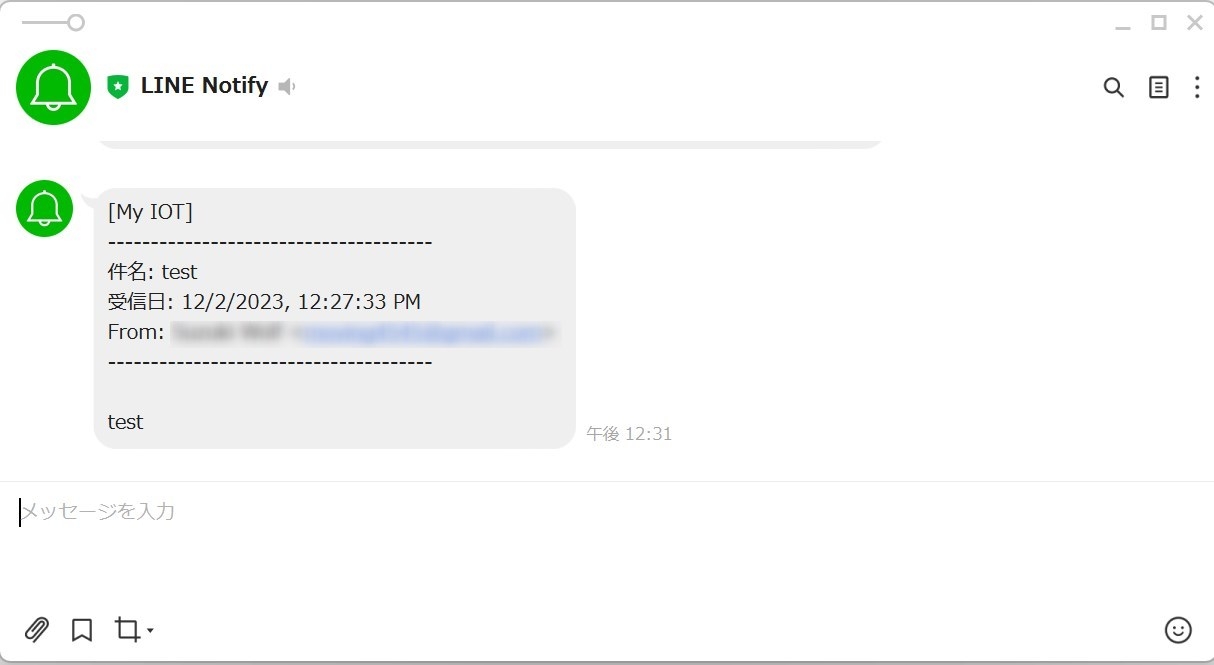
const notice = `
--------------------------------------
件名: ${latestMessage.getSubject()}
受信日: ${latestMessage.getDate().toLocaleString()}
From: ${latestMessage.getFrom()}
--------------------------------------
${latestMessage.getPlainBody().slice(0, 350)}
`
notices.push(notice)
latestMessage.markRead()
}
return notices
}
function send(notice) {
if (LINE_NOTIFY_TOKEN === null) {
Logger.log('LINE_NOTIFY_TOKEN is not set.')
return
}
const options = {
'method': 'POST',
'headers': {'Authorization': `Bearer ${LINE_NOTIFY_TOKEN}`},
'payload': {'message': notice},
}
UrlFetchApp.fetch(ENDPOINT, options)
}で、一行目と二行目を書き換えてください。
const LINE_NOTIFY_TOKEN = '取得したトークンを記入'
const FROM_ADDRESS = ['xxxxx@xxxxx.xxxxxxx.jp','xxxxxxxxx@gmail.com'].join(' OR ')
一行目は 「取得したトークンを記入」 をトークンに書き替えてください。
二行目は、メールアドレスを書き換えてください。
メールアドレスが2つ書いてあるのは、自分の場合、一つ目が本番で注意しないとならないメールアドレスで、二つ目はテスト確認用のメールアドレスです。
二つ目のアドレスから「google apps script」で作成したIDへメールを送って、「Line Notify」で受信できれば、本番で注意しなければならないメールも届くだろうということです。
書き換えたら、実行して見ましょう。
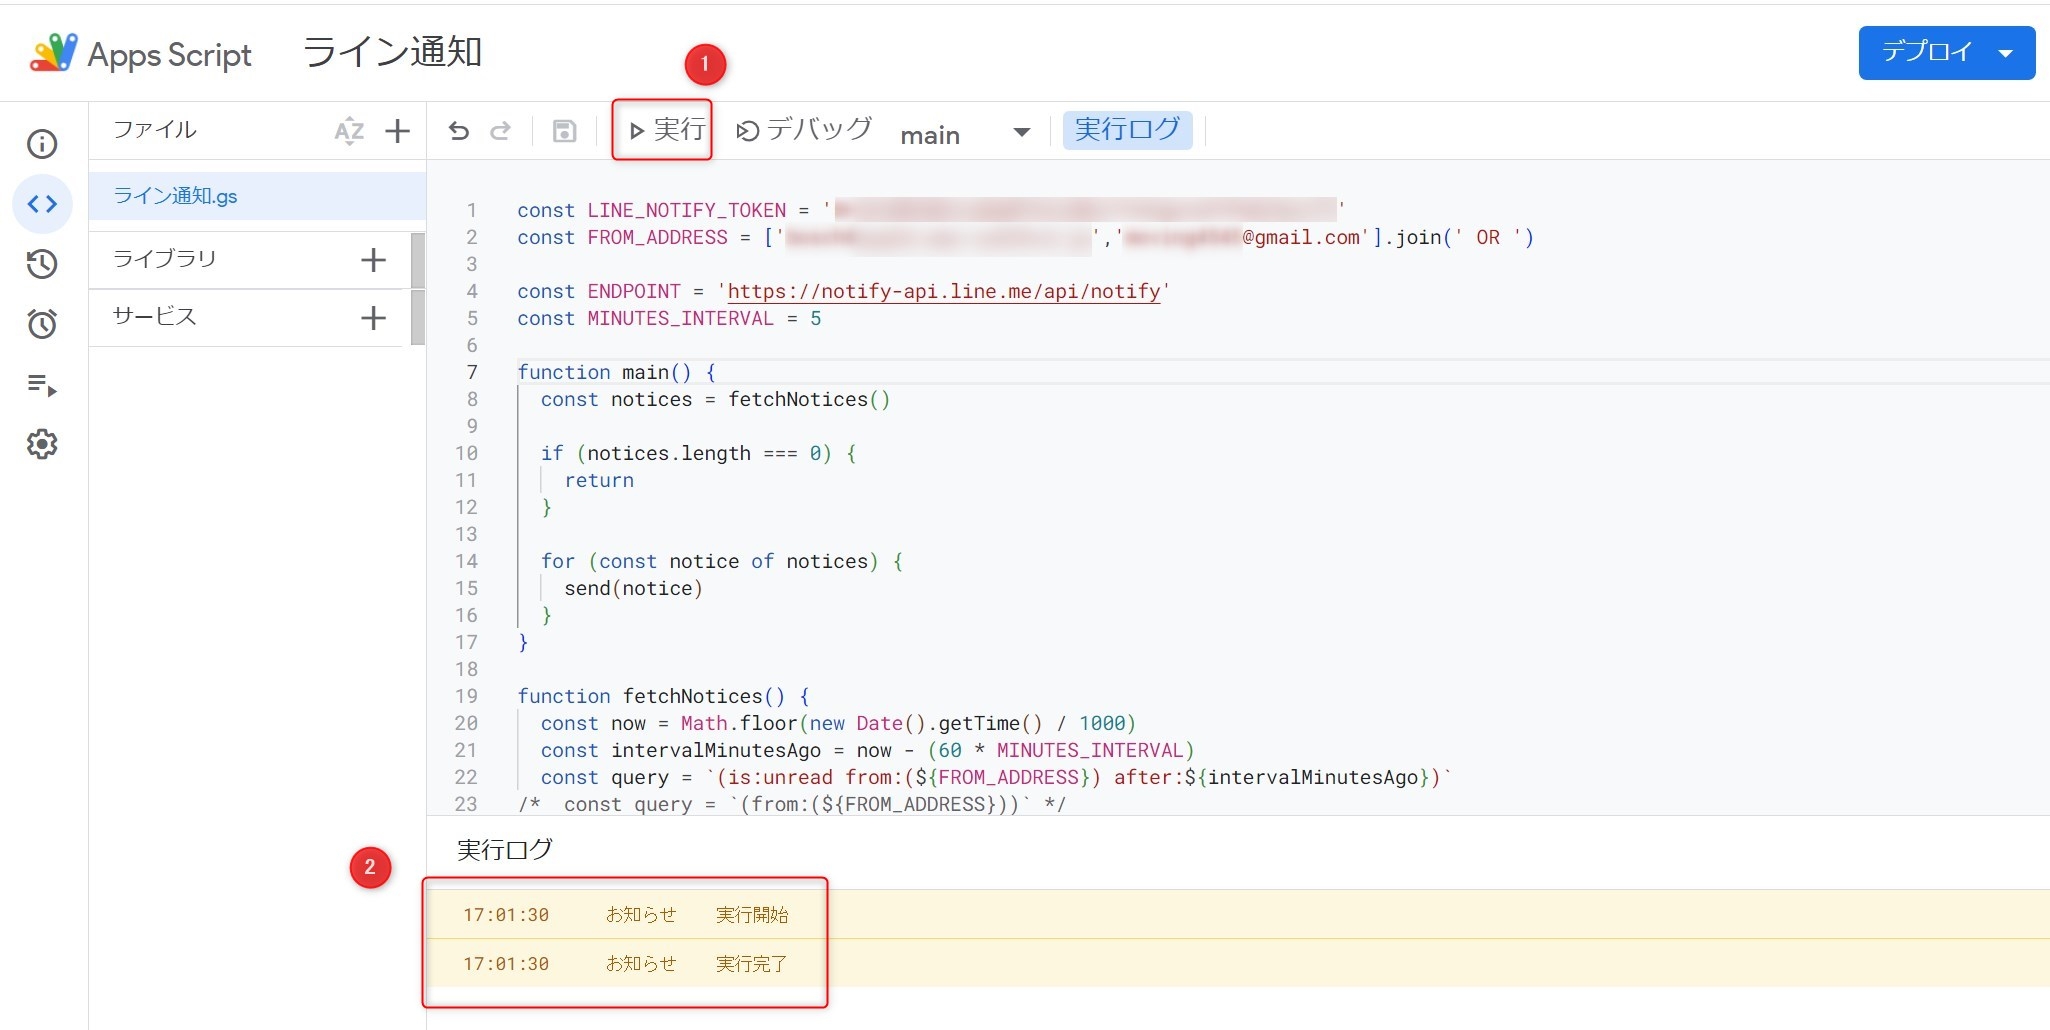
赤丸①の実行を押して、赤丸②のようなログが出れば、成功してLine Notifyへ通知が来ます。
という感じで、コードは完成。
あとはコードのスケジューリングを設定します。
以下の図の順番で設定します。
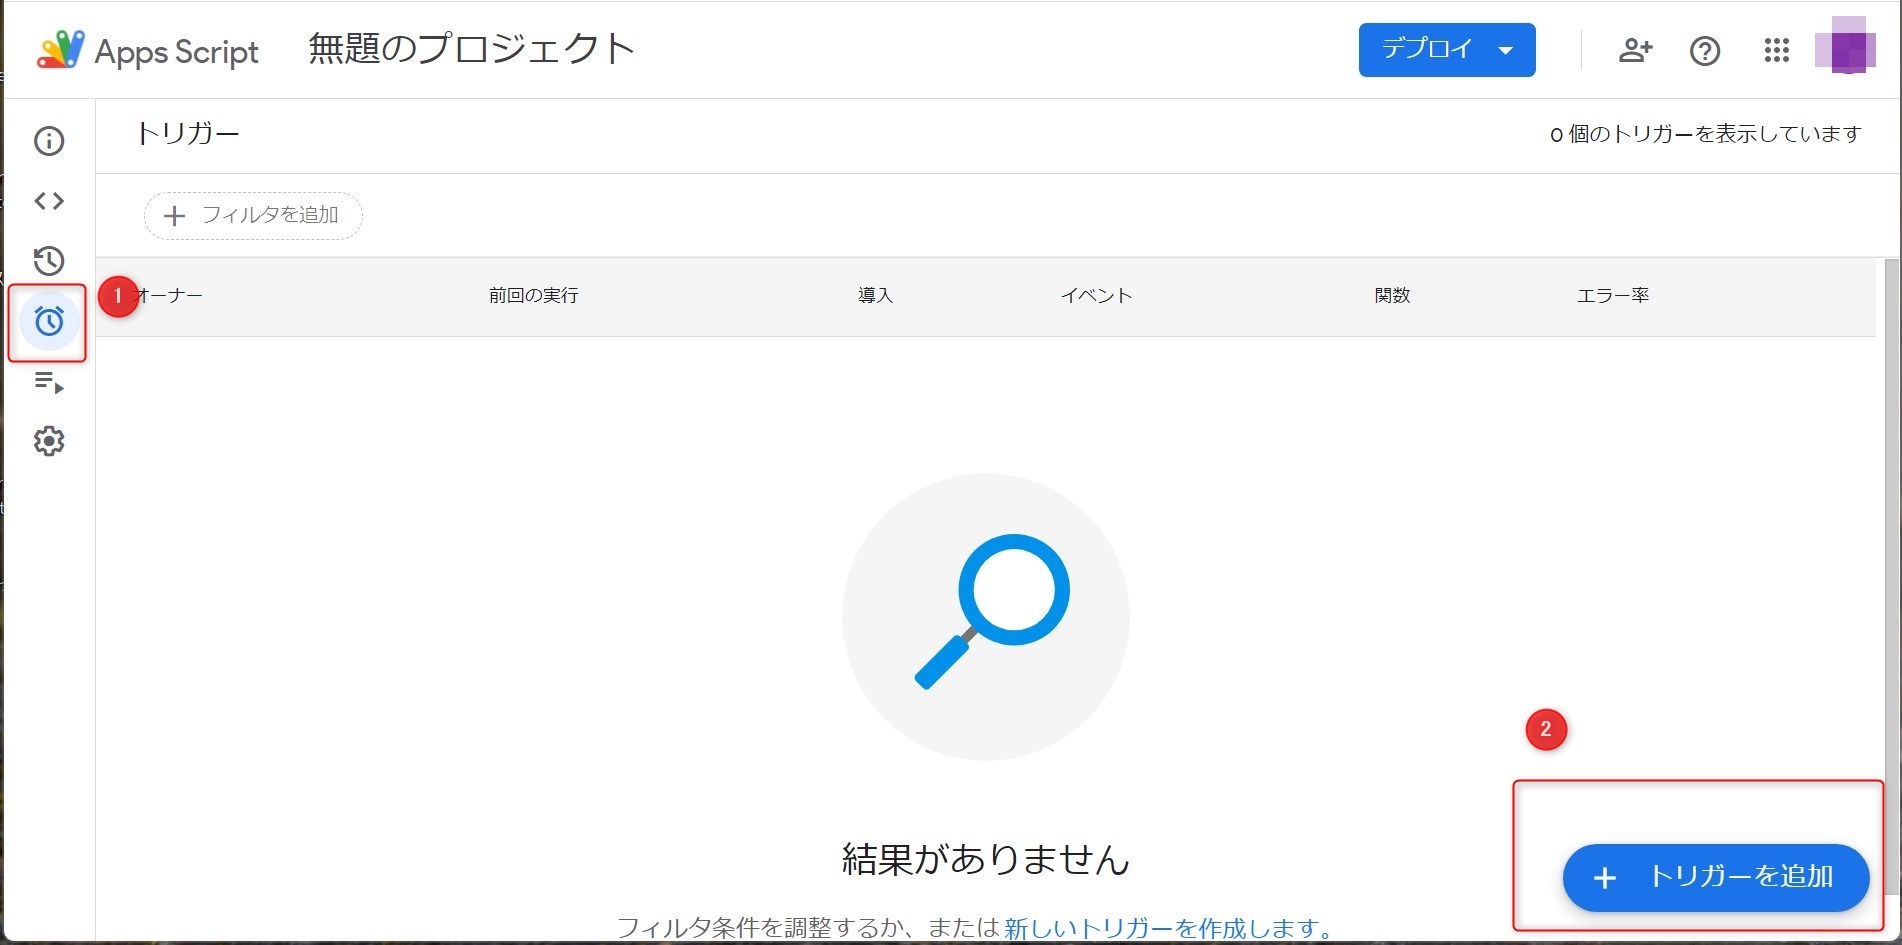
すると、以下のような画面が出ますが、内容を以下のように変更します。
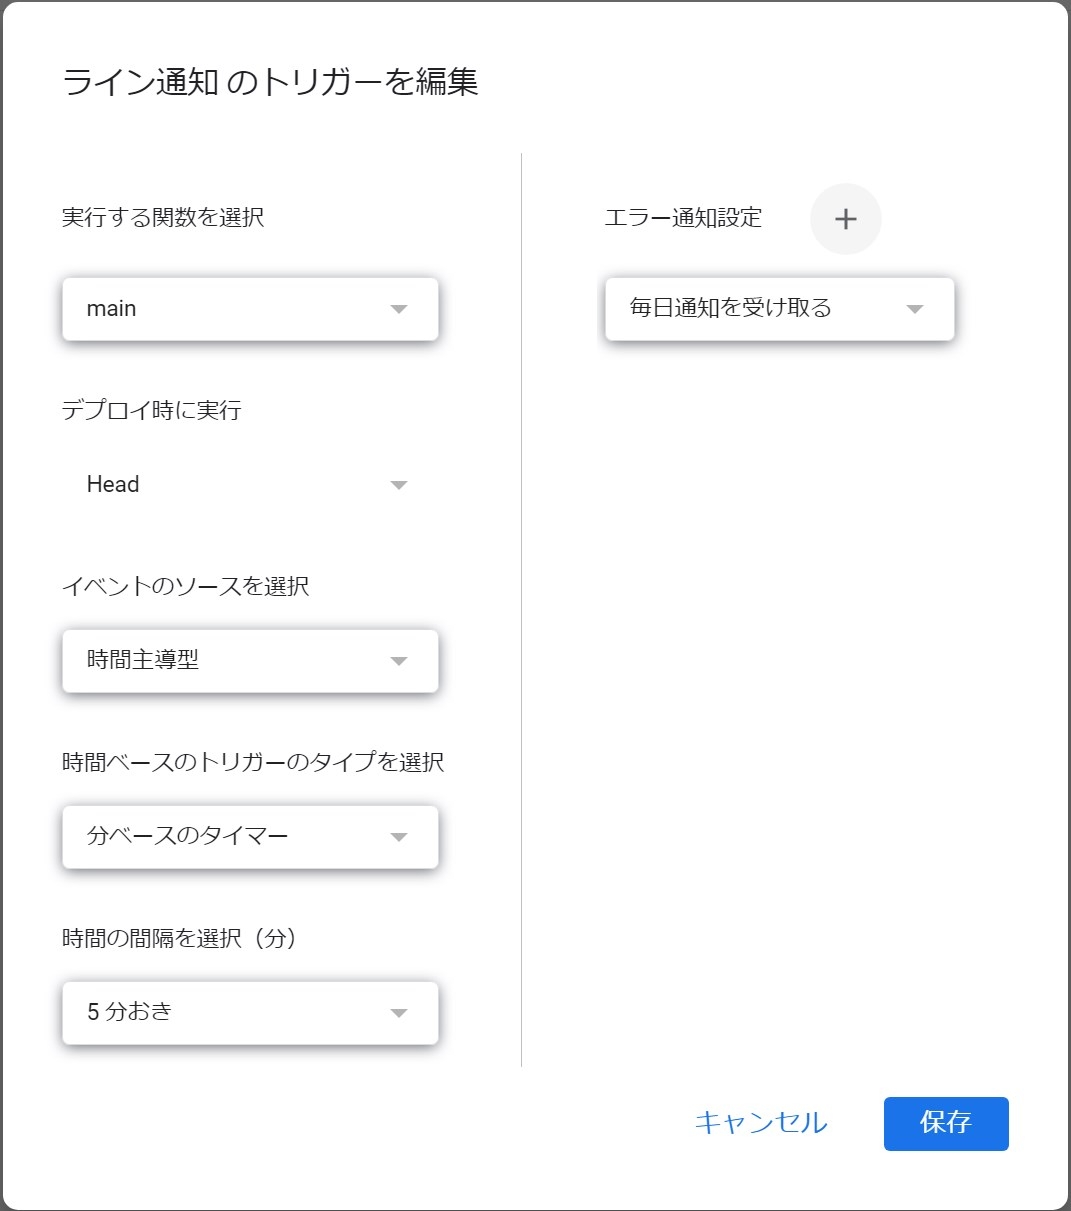
左上から説明すると、走らせるコードを示しますので、mainでOKです。
5分毎にこのスクリプトを走らせたいので、時間主導型を選択して、上図のようにします。
エラー通知は図と違い「今すぐ通知を受け取る」で、都度エラーが受け取れると思います。
これで、メールの転送は終了です。
コピペでOKなので、楽でいいですね。
参照元の方に感謝です。ありがとうございました。
Google カレンダーの転送
さて、続いてGoogleカレンダーの予定を転送する方法ですが、同じくGAS「google apps script」で組みます。
とはいえ、これこそ参照元のサイトからのコピーです。
参照元は以下です。↓

このコード、優秀過ぎてコピペだけで手を入れる所が無いという。。
素晴らしい、自分は送信してくれる時間だけを変更しましたが。。
コードを書いておきます。
const LINE_NOTIFY_TOKEN = “xxxxxxxxxxxxxxxxxxxx”;のトークンだけ書き換えてください。
//A,LINE Notifyと接続する設定
const LINE_NOTIFY_TOKEN = "xxxxxxxxxxxxxxxxxxxx";
const LINE_NOTIFY_API = "https://notify-api.line.me/api/notify";


//Googleカレンダーから当日分の予定を全て取得し、予定の配列を作成する関数
function sendMessage() {
  //B,カレンダーから取得する時間の設定
  const today = new Date();
  today.setHours(00); //当日の午前12時の「時」
  today.setMinutes(00); //「分」
  today.setSeconds(00); //「秒」
  const tomorrow = new Date(Date.parse(today) + (24 * 60 * 60 * 1000)); //翌日の午前12時を設定

 //C,予定を取得する日付の取得
  const monthNum = (today.getMonth())+1; //月
  const dateNum = today.getDate(); //日
  const day = today.getDay(); //曜日
  const dayArray = ['日','月','火','水','木','金','土'];
  const thisDate = monthNum + "月" + dateNum + "日"; //当日の日付を文字列に変換
 let sendMessage = "\nおはようございます。\n" + thisDate + "(" + dayArray[day] + ")";

  //D,カレンダーから予定を取得
  let events = CalendarApp.getEvents(today, tomorrow); //取得する当日のカレンダーの予定をすべて取得
  let schedule = ""; //配列から文字列に変換した予定の文字列
  let messageArray = []; //取得した予定を格納する配列

  //E,取得した予定を配列に格納
  for (var i in events) {
    const number = "\n" + (Number(i) + 1) + "件目"; //予定の件数
    const startHours = "0" + events[i].getStartTime().getHours();
    const startMinutes = "0" + events[i].getStartTime().getMinutes();
    const startTime = startHours.slice(-2) +":"+ startMinutes.slice(-2); //開始時間
    const endHours = "0" + events[i].getEndTime().getHours();
    const endMinutes = "0" + events[i].getEndTime().getMinutes();
    const endTime = endHours.slice(-2) +":"+ endMinutes.slice(-2); //終了時間
    const time = "\n【時間】" + startTime +" ~ "+ endTime; //予定を行う日時
    const title = "\n【予定】" + events[i].getTitle(); //予定のタイトル
    let location = ""; //場所
    let description = ""; //詳細

    //空白ではないときの処理
    if(!events[i].getLocation() == null || !events[i].getLocation() == ""){
      location = "\n【場所】" + events[i].getLocation();
    }
    if(!events[i].getDescription() == null || !events[i].getDescription() == ""){
      description = "\n【詳細】" + events[i].getDescription();
    }

    //カレンダーから得たデータを文にまとめて配列に格納
    const message = number + time + title + location + description;
    messageArray.push(message);
 }

 //F,送信する文章を作成
 for(var j=0; j<=messageArray.length-1; j++){
   schedule += messageArray[j];
 }
 if(schedule == "" || schedule == null){
   sendMessage += "の予定はありません。\n";
 }else{
   sendMessage += "の予定です。\n" + schedule;
 }

 //G,LINEに送信
 const options =
  {
    "method"  : "post",
    "payload" : "message=" + sendMessage,
    "headers" : {"Authorization" : "Bearer "+ LINE_NOTIFY_TOKEN}
  };
 UrlFetchApp.fetch(LINE_NOTIFY_API, options);

 //H,翌日に実行するトリガーを作成
 today.setDate(today.getDate() + 1);
 today.setHours(6);
 today.setMinutes(0);
 today.setSeconds(0);
 ScriptApp.newTrigger('sendMessage').timeBased().at(today).create();
}
実行される時間は朝の6時になってます。
変更する場合、以下を変更してください。
//H,翌日に実行するトリガーを作成
 today.setDate(today.getDate() + 1);
 today.setHours(6);
 today.setMinutes(0);
 today.setSeconds(0);
上の6が6時、次が分、次が秒ですね。
ということで、簡単に説明させて頂きました。
**** 追記 ****
上のカレンダーの予定を実行するScriptですが、エラーが出るようになりました。
エラー内容はトリガーが多すぎる。とのこと。
では修正しようということで、ChatGPTを利用して修正しました。
便利ですね。すぐ終わりました。
//A,LINE Notifyと接続する設定
const LINE_NOTIFY_TOKEN = "xxxxxxxxxxxxxxxx";
const LINE_NOTIFY_API = "https://notify-api.line.me/api/notify";

//Googleカレンダーから当日分の予定を全て取得し、予定の配列を作成する関数
function sendMessage() {
  //B,カレンダーから取得する時間の設定
  const today = new Date();
  today.setHours(00); //当日の午前12時の「時」
  today.setMinutes(00); //「分」
  today.setSeconds(00); //「秒」
  const tomorrow = new Date(Date.parse(today) + (24 * 60 * 60 * 1000)); //翌日の午前12時を設定

 //C,予定を取得する日付の取得
  const monthNum = (today.getMonth())+1; //月
  const dateNum = today.getDate(); //日
  const day = today.getDay(); //曜日
  const dayArray = ['日','月','火','水','木','金','土'];
  const thisDate = monthNum + "月" + dateNum + "日"; //当日の日付を文字列に変換
 let sendMessage = "\nおはようございます。\n" + thisDate + "(" + dayArray[day] + ")";

  //D,カレンダーから予定を取得
  let events = CalendarApp.getEvents(today, tomorrow); //取得する当日のカレンダーの予定をすべて取得
  let schedule = ""; //配列から文字列に変換した予定の文字列
  let messageArray = []; //取得した予定を格納する配列

  //E,取得した予定を配列に格納
  for (var i in events) {
    const number = "\n" + (Number(i) + 1) + "件目"; //予定の件数
    const startHours = "0" + events[i].getStartTime().getHours();
    const startMinutes = "0" + events[i].getStartTime().getMinutes();
    const startTime = startHours.slice(-2) +":"+ startMinutes.slice(-2); //開始時間
    const endHours = "0" + events[i].getEndTime().getHours();
    const endMinutes = "0" + events[i].getEndTime().getMinutes();
    const endTime = endHours.slice(-2) +":"+ endMinutes.slice(-2); //終了時間
    const time = "\n【時間】" + startTime +" ~ "+ endTime; //予定を行う日時
    const title = "\n【予定】" + events[i].getTitle(); //予定のタイトル
    let location = ""; //場所
    let description = ""; //詳細

    //空白ではないときの処理
    if(!events[i].getLocation() == null || !events[i].getLocation() == ""){
      location = "\n【場所】" + events[i].getLocation();
    }
    if(!events[i].getDescription() == null || !events[i].getDescription() == ""){
      description = "\n【詳細】" + events[i].getDescription();
    }

    //カレンダーから得たデータを文にまとめて配列に格納
    const message = number + time + title + location + description;
    messageArray.push(message);
 }

 //F,送信する文章を作成
 for(var j=0; j<=messageArray.length-1; j++){
   schedule += messageArray[j];
 }
 if(schedule == "" || schedule == null){
   sendMessage += "の予定はありません。\n";
 }else{
   sendMessage += "の予定です。\n" + schedule;
 }

 //G,LINEに送信
 const options =
  {
    "method"  : "post",
    "payload" : "message=" + sendMessage,
    "headers" : {"Authorization" : "Bearer "+ LINE_NOTIFY_TOKEN}
  };
 UrlFetchApp.fetch(LINE_NOTIFY_API, options);
}
トークンと時間設定だけ変えれば利用できると思います。
う~ん。。ChatGPT、便利です。
ログインから5分で完了かぁ。。
Scriptの知識無くても、ChatGPTで出来ちゃうのだから、本も要らないことになりそうですけど、、、
まぁ、一応、基本的なところが分からないと話にならないので、以下を紹介しておきます。
ちなみにGoogle Apps Scriptをさらに学習したい方はGoogle Apps Scriptの本はいかがでしょうか。